By Gary D’Atrio

If you are a graphic designer creating a document that will be printed by a commercial offset or digital print provider like Newark Trade, it is recommended that you provide a “print ready” PDF. This will ensure that there are no problems with fonts, linked images or special characters as long as the PDF is made properly. Here are the steps needed to create a “print ready” PDF from the most widely used page layout app, Adobe InDesign, using PDF presets.
Don’t forget the bleed and crop marks!
This is the most important, and most overlooked, step that should be addressed at the start of the project. Anything on the page that goes up to the trim edge should be set up with a .125” bleed. For more on bleeds, see my previous blog: https://www.newarktrade.com/blog/2018/02/21/by-gary-datrio/
 PDF Presets
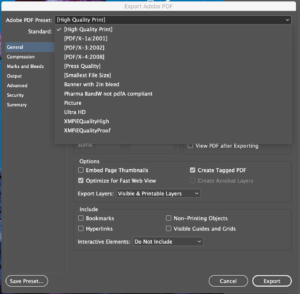
Adobe InDesign comes with several PDF presets that will cover most of the print and web scenarios you will encounter. The PDF/X-1a:2001 setting is good for 4-color offset printing since it converts the file to CMYK using the US – Web Coated (SWOP) color profile. The High Quality Print setting is good for digital printing that is toner or inkjet based. But both of those presets lack what I mentioned about above: Don’t forget the bleed and crop marks!
 Create New Presets
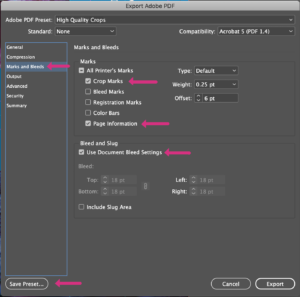
To save you time in the future, I would recommend creating two new presets based on the previous two mentioned. While exporting a PDF, choose the High Quality Print in the PDF Presets. In the left column choose Marks and Bleeds. Click on the Crop Marks, Page Information, and the Use Document Bleed Settings options. In the lower left, click on the Save Preset… button and name it High Quality Crops. Do the same steps starting with the PDF/X-1a preset.
Now you are prepared to send your “print ready” PDF to either an offset or digital printer confident that it will be trouble-free and accurate.